- Your cart is empty
- Continue Shopping

The In-Office Revolution: Mastering Indirect Composites with a Dental Lab Curing Light Unit
-
dentsmadental
- Posted on
Modern dentistry is shifting towards efficiency and autonomy. Gone are the days when every complex restoration required a two-week wait for an external laboratory. By bringing digital workflows and advanced fabrication tools chairside, dentists can now deliver high-quality indirect composite restorations in a single visit. At the heart of this transformation is a critical piece of equipment: the dental lab curing light unit.
When to Choose Indirect Composite Restorations
Indirect composite restorations are fabricated outside the mouth on a model or via 3D printing, then bonded into place. They are the ideal solution for cases where direct composite fillings might fail due to polymerization shrinkage, inadequate anatomy, or compromised strength.
Key cases include:
- Large MOD Cavities: When a cavity involves multiple surfaces, especially missing cusps, indirect composites offer superior fracture resistance.
- Severe Wear Cases: For patients restoring vertical dimension, indirect materials allow for precise build-up and durable occlusion.
- Aesthetic Demands: Anterior cases requiring complex layering, characterization, or translucency effects are easier to control indirectly.
The In-Office Fabrication Workflow
The process of creating these restorations is streamlined when you have the right technology. Below is a typical workflow for an in-office indirect restoration.
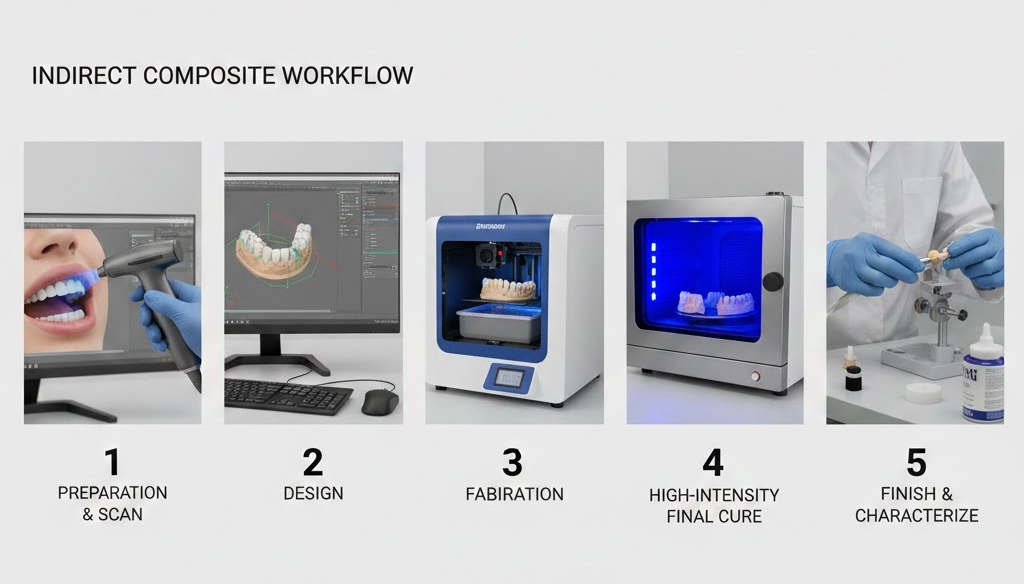
1. Preparation & Scan: After tooth preparation, a digital impression is taken using an intraoral scanner.
2. Design: The restoration is designed in CAD software to achieve perfect anatomy and contact points.
3. Fabrication: The design is either 3D printed to create a model for hand-layering, or milled from a composite block.
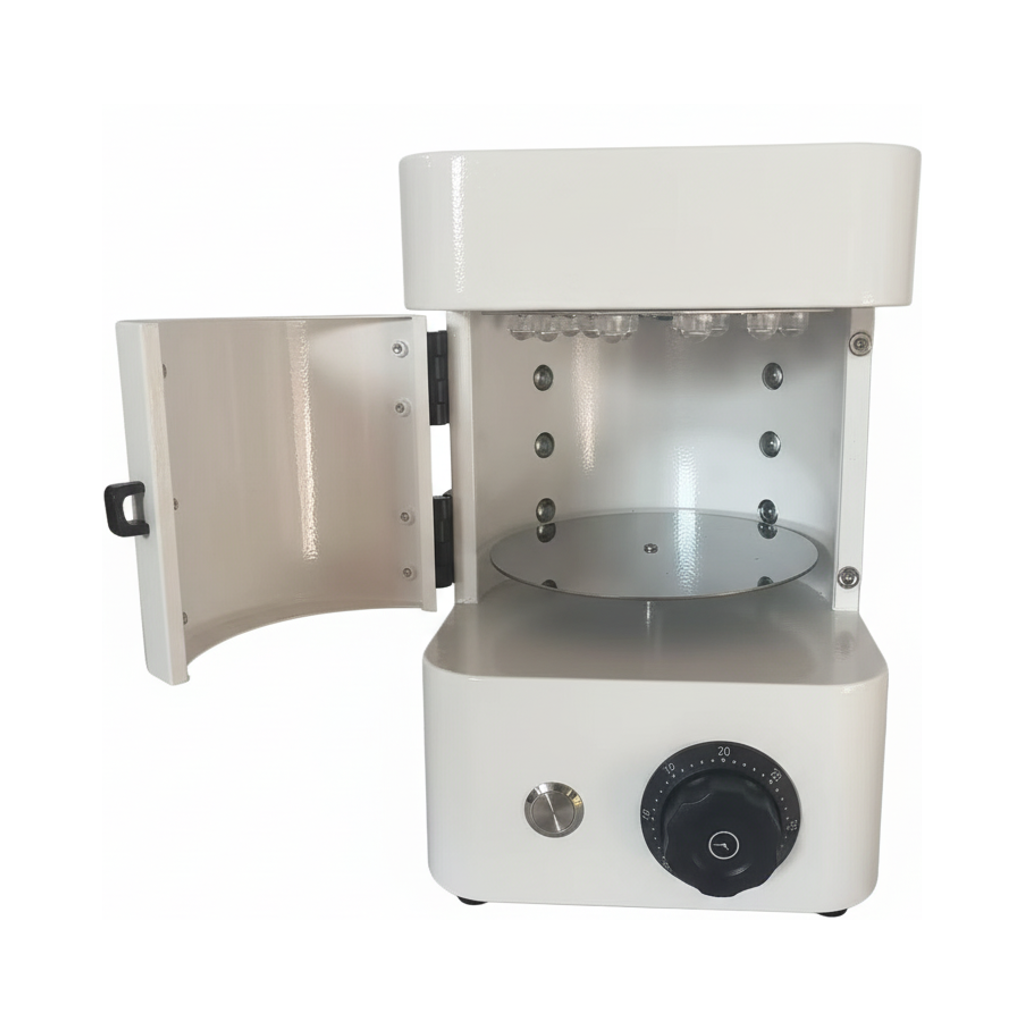
4. Curing: This is the most critical step. Whether hand-layered on a die or milled, the restoration requires a high-intensity final cure.
5. Finishing: The restoration is polished, and characterizations are added before final delivery.
The Power of Triple-Wavelength Technology
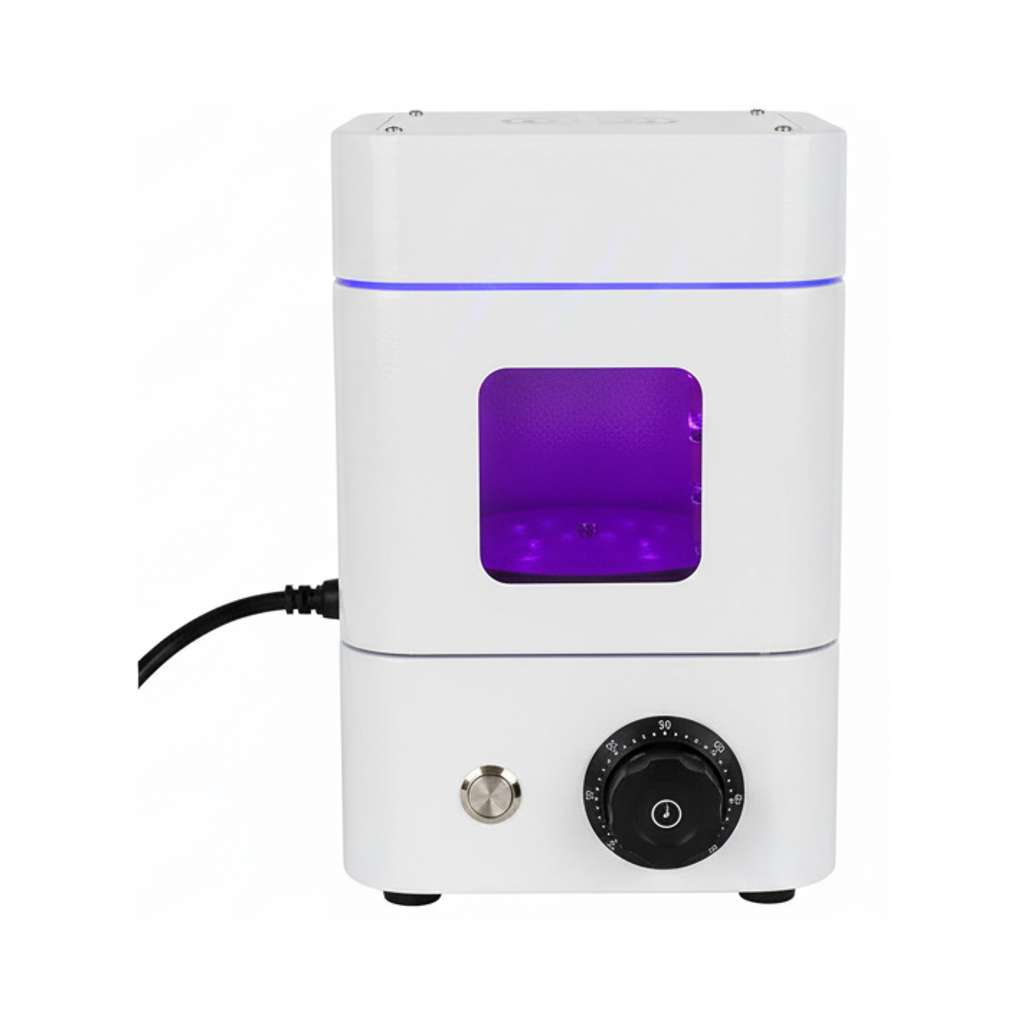
Not all curing lights are created equal. Standard handheld curing lights are often insufficient for fully polymerizing laboratory-grade composite resins, which are denser and contain different photoinitiators. This is where a triple-wavelength curing light unit becomes indispensable.
Using a unit with triple-spectrum LED light ensures that every type of photoinitiator within the composite material is activated. This results in a higher degree of conversion, meaning the restoration is stronger, more wear-resistant, and less prone to staining. By having this unit in the office, you ensure the material reaches its maximum physical potential without relying on an external lab.
Beyond Restorations: Surgical Guides and Models
The utility of the dental lab curing light unit extends beyond just inlays and onlays. In a digital office, versatility is key. This same device is essential for post-curing 3D printed surgical guides, ensuring they are rigid and biocompatible before implant surgery. It is also perfect for curing light-cured custom impression trays, providing a perfect fit for final impressions. Furthermore, it stabilizes 3D printed resin models, preventing deformation over time.
Loboratory Curing Light Unit Parameter:
| Key Parameter | Technical Specification | Clinical Benefit |
|---|---|---|
| Light Spectrum | Triple-Spectrum (365nm / 405nm / 460nm) | Universal Compatibility: Capable of activating all types of photoinitiators found in modern dental resins and composites. |
| 365nm (UVA) | Deep Polymerization Band | Ensures thorough curing through thicker layers and specialty laboratory resins. |
| 405nm (Violet) | Standard 3D Printing Wavelength | Optimized for post-curing surgical guides, splints, and 3D printed resin models. |
| 460nm (Blue) | Camphorquinone Peak | Provides high-intensity curing for standard indirect composite restorations (inlays/onlays). |
| Design | All-in-One Compact Unit | Space-Saving: Small footprint fits seamlessly into a modern dental office without needing a dedicated lab room. |
| Application | Versatile Office Lab Tasks | Multi-Functional: One machine handles indirect restorations, custom trays, and 3D printed parts efficiently. |
Close Thoughts
Integrating a laboratory curing light unit into your practice allows you to take full control of the indirect fabrication process. It bridges the gap between the dental chair and the dental lab, offering patients durable, aesthetic restorations without the wait. By mastering this workflow, you elevate the standard of care you provide, all within the comfort of your own